

Table of Contents
- Understanding Wall Thickness and Pipe Schedule
- Tools You'll Need to Measure Steel Tubing Thickness
- How to Measure Tubing with Calipers
- Using an Ultrasonic Thickness Gauge for Steel
- Steel Tubing Wall Thickness Chart and Gauge Reference
- Measurement Error Mitigation and Best Practices
- Identifying Tubing Specifications Without Measuring
- Conclusion
- Frequently Asked Questions
Last Updated: October 8, 2026
Understanding Wall Thickness and Pipe Schedule
Wall thickness is the distance between the outer and inner surface of a steel tube, measured in inches or millimeters. Thicker walls provide more strength and durability.
Pipe schedule is a standardized system that pairs outside diameter with wall thickness. The higher the schedule number, the thicker the walls: Schedule 40 is common for general use, while Schedule 80 handles higher pressure.
Together these define a tube's strength, weight, and load capacity.
What Wall Thickness Means
Wall thickness affects how much weight and pressure a tube can handle. A 1-inch square tube with 0.083-inch walls (like our Square Tubing-1" x 1" x 14ga (0.083") Wall Steel Tubing) is lighter and more flexible than the same size at 0.125 inches.

Thicker walls mean greater rigidity; thinner walls save weight and cost. Match wall thickness to your project demands.
Measuring accurately ensures the right material for the job, a mistake can mean a frame that fails under load or wasted money on overkill.
How Pipe Schedule Relates to Thickness
Pipe schedule is used primarily for round pipes:
- Schedule 40: Standard thickness for most applications
- Schedule 80: Thicker walls, handles higher pressure
- Schedule 160: Extra-heavy walls, specialized industrial use
Rectangular and square tubing typically uses gauge numbers instead. A 14-gauge tube has 0.083-inch walls; an 11-gauge has 0.125-inch walls. The lower the gauge number, the thicker the material.
At JWM Metal Supply, we list wall thickness both ways, "14ga (0.083")" shows the gauge number and decimal equivalent together.
Tools You'll Need to Measure Steel Tubing Thickness
Accurate measurement requires precision instruments that give consistent results. The best tools for measuring steel tubing thickness are calipers and micrometers, both affordable and widely available. A tape measure works for quick field checks but is less precise.
Precision Tools for Accurate Measurements
Digital calipers display measurements on a screen, accurate to 0.01 inches.
Analog calipers (dial or vernier) are reliable and durable but require reading a scale.
Micrometers are more precise, accurate to 0.001 inches, but have a smaller range and take longer to use.
For most DIY and contractor work, digital calipers are the sweet spot: affordable, accurate, and easy to read.
How to Measure Tubing with Calipers
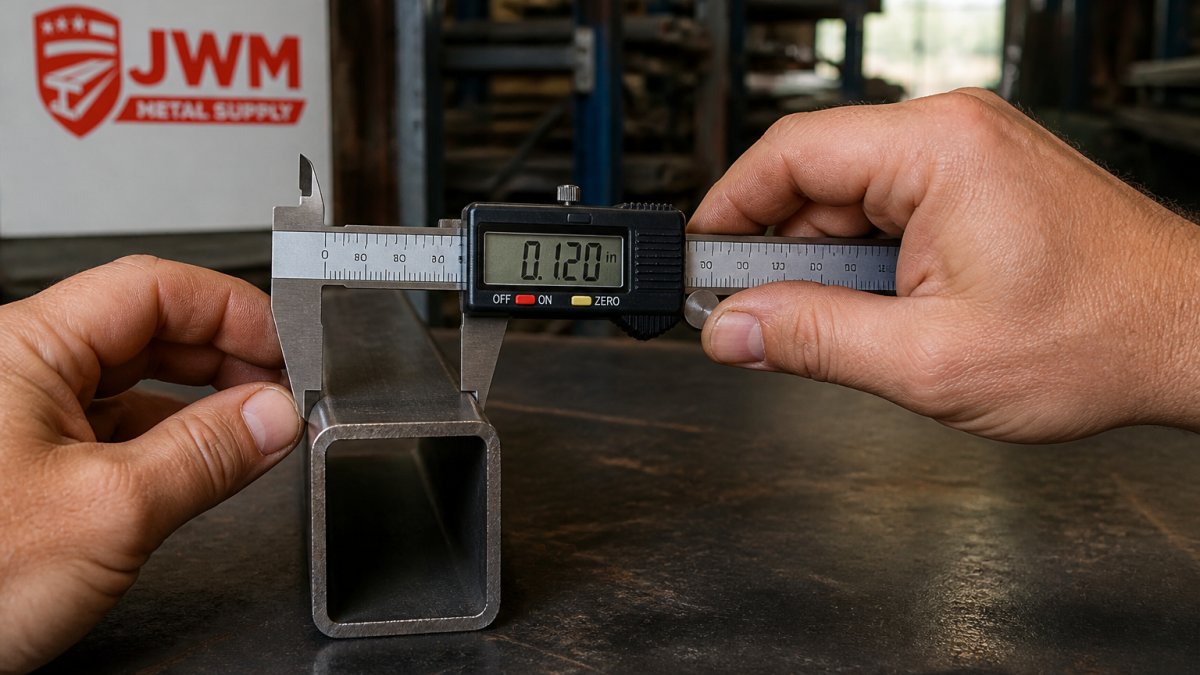
Calipers are the most practical tool for measuring steel tubing wall thickness, clamping onto the tube and reading the measurement directly.
Digital vs. Analog Calipers
Digital calipers display measurements on an LCD screen, zero, clamp, and read. They're accurate to 0.01 inches and preferred for being faster and less error-prone.
Analog calipers use a dial or vernier scale, requiring more skill but never needing batteries.
For beginners, digital calipers win: cheaper, faster, and harder to misread.
Step-by-Step Measurement Process
Step 5: Close the jaws Tighten until snug, firm contact, not crushing pressure.
Step 6: Read the measurement Read the screen (digital) or align the needle or scale line (analog).
Step 8: Calculate wall thickness Subtract the inside diameter from the outside diameter, then divide by two.
Formula: (Outside Diameter − Inside Diameter) ÷ 2 = Wall Thickness
This matches the 14-gauge specification on our Square Tubing product.
Using an Ultrasonic Thickness Gauge for Steel
An ultrasonic thickness gauge (UTG) measures wall thickness from one side of the tube only, essential on an installed handrail, welded frame, or tube already part of a structure where calipers can't reach the inside wall. It fires a high-frequency sound pulse into the steel, times the bounce off the back wall, and converts that time into a thickness reading.
How the Measurement Actually Works
A piezoelectric transducer converts an electrical pulse into a sound wave that reflects off the inner wall and returns to the probe. The gauge applies:
Thickness = (Sound Velocity × Time) ÷ 2
The "÷ 2" accounts for the round trip. For carbon steel, longitudinal sound velocity is roughly 0.2320 in/µs. A wrong velocity setting makes every reading proportionally wrong, a 5% error on a 0.083" wall is over 0.004" off.
Setting Up the Gauge Correctly
1. Select the right transducer. Dual-element probes are standard for tube walls, handling curved or rough surfaces better.
**2.
3. Apply couplant. A thin, even layer of gel, glycerin, or oil bridges the air gap.
**4.
5. Take multiple readings. Take at least four readings around the circumference and average them, keeping the probe perpendicular, tilting reads thin.
Advantages and Limitations
Advantages:
- Measures from one side only
- Non-destructive
- Fast, seconds per reading once set up
- Works on installed, welded, or painted tubing
- Detects internal corrosion or wall thinning calipers would miss
Limitations:
3" x 4" x 11ga (0.125") Rectangle Steel Tubing — Select Length →
- Higher upfront cost than calipers, with probes a separate expense
- Requires couplant and a reasonably clean, accessible surface
- Accuracy degrades below roughly 0.050" as front and back echoes overlap
- Curved, rough, or pitted steel scatters the signal
- Needs periodic calibration
- Overkill for one-off shop measurements where calipers are faster and cheaper
When to Reach for the Ultrasonic Gauge
Use calipers when the tube is loose, both walls are reachable, and you want a quick, cheap reading. Reach for the ultrasonic gauge when the tube is installed, welded in place, or only one face is accessible, or to check internal wall thinning across a long run without cutting. For a single piece, calipers win; for inspection of existing structures or production runs, the ultrasonic gauge pays for itself.
Steel Tubing Wall Thickness Chart and Gauge Reference
Gauge numbers and their decimal equivalents make it easy to verify what you're ordering.
| Gauge | Decimal Equivalent | Millimeters |
|---|---|---|
| 11ga | 0.125" | 3.18mm |
| 12ga | 0.109" | 2.77mm |
| 14ga | 0.083" | 2.11mm |
| 16ga | 0.065" | 1.65mm |
Common Gauges and Decimal Equivalents
Gauge numbers are a legacy system, lower numbers mean thicker material.
Our 3" x 4" x 11ga Rectangle Steel Tubing uses 11-gauge walls at 0.125 inches. Our Square Tubing-1-1/2" x 1-1/2" x 14ga uses 14-gauge at 0.083 inches.


Measure 0.083 inches and you know it's 14-gauge, helping you match standard products or replacements.
Standard Dimensions for Structural Tubing
Structural tubing comes in square, rectangular, and round profiles, each with standard wall thickness options.
Rectangular tubing like 3x4 or 4x6 offers more strength in one direction, ideal for beams and frames.
Round tubing provides equal strength in all directions, common for structural supports and aesthetic applications.
Knowing these sizes helps you identify what you have and order replacements with confidence.
Measurement Error Mitigation and Best Practices
Small measurement mistakes add up, a 0.01-inch error affects load capacity and fit.
Common Measurement Mistakes
Measuring at a weld: Welds are thicker than base metal, measure at least 1 inch away.
Pressing too hard: Excessive pressure can bend thin walls and give false readings.
Measuring at corners: Square tubing has a corner radius, measure along a flat section.
Dirty surfaces: Mill scale, rust, or oil adds thickness, wipe the area clean first.
Ensuring Accuracy Across Multiple Points
Take measurements at three or four points roughly 90 degrees apart and record each.
Readings within 0.01 inch of each other mean consistent wall thickness; variation over 0.02 inch suggests damage or out-of-spec tube.
Average your measurements for the most accurate final result.
Identifying Tubing Specifications Without Measuring
Sometimes you have tubing with no label, no paperwork, and no calipers within reach. A structured visual and physical check can still narrow down its wall thickness before you measure.
Step 1: Read the Markings
Domestic structural tubing is frequently stamped, ink-printed, or tagged with a spec string. Look for:
- "1x1x14ga" or "1-1/2 x 1-1/2 x 0.083", size and wall thickness
- "A500" or "A513", common structural tubing specifications (ASTM standards)
- Heat numbers or mill codes, traceable to the mill's certification
Markings are often on one flat face near the end and may be faint under mill scale. Wipe the surface and check all four sides before concluding there is none.
Step 2: Examine the End Cross-Section
Cut or find a clean, square end and look straight at the wall:
- 16ga (0.065"), thin, almost knife-edge; looks like sheet metal
- 14ga (0.083"), noticeably thicker; reads as a solid band
- 12ga (0.109"), clearly substantial
- 11ga (0.125"), heavy; about an eighth of an inch and chunky relative to the tube size
Hold the end against a known reference, a drill bit shank, feeler gauge leaf, or coin, and compare. A U.S. nickel is about 0.077" thick, close to 14ga. These are rough comparisons, but they separate 16ga from 11ga at a glance.
Step 3: Compare Weight for the Same Size
For two pieces of the same nominal size, the heavier one has the thicker wall. A 1x1 square tube in 11ga weighs roughly 50% more per foot than the same tube in 14ga. Heft both and the difference is obvious; with a scale, weigh a known length against a tubing weight chart to point to the gauge.
Step 4: Check the Corner Radius
On square and rectangular tubing, the outside corner radius scales with wall thickness: thin-wall tube has a tight corner, heavy-wall a visibly larger, rounder one. A secondary cue that reinforces the cross-section and weight.
Step 5: Use Reference Samples
The most reliable no-tool method is comparison. Keep labeled offcuts of each gauge you commonly use, 16ga, 14ga, 12ga, 11ga, stored together. Match an unknown piece against them by wall band and corner radius. Faster than measuring every piece, and it catches mixed stock before it goes into a project.
Step 6: Check Supplier Documentation
If the material came from a supplier, the packing slip, mill certification, or order confirmation lists the exact specification. Keep those records with the material or in a project folder, the spec string lets you match the original gauge without measuring.
Conclusion
Learning how to measure steel tubing thickness is straightforward once you understand the tools.
When you order from JWM Metal Supply, we handle the precision for you. Whether you need 11-gauge rectangle tubing or 14-gauge square stock, we deliver material certifications so you know exactly what you're getting.
Shop Now and get the right steel for your project, cut to length, shipped fast, with no minimum order required.
Frequently Asked Questions
What's the best tool for measuring steel tubing wall thickness?
Digital calipers are ideal for most DIY and fabrication work because they're affordable, portable, and accurate to within 0.01 inches. For non-destructive measurement on installed tubing, an ultrasonic thickness gauge is best, though it costs more. A micrometer works well for precise measurements on smaller tubing, while a tape measure combined with a gauge chart works for quick estimates on standard sizes.
Can you measure steel tubing thickness with calipers without cutting it?
Yes. Measure the outside diameter with calipers, then subtract twice the wall thickness reading from the inside diameter measurement. For most structural tubing, you can compare your outside diameter reading against a standard pipe schedule and wall thickness chart to identify the gauge without any cutting or damage to the material.
How accurate are ultrasonic thickness measurements on steel tubing?
Ultrasonic gauges typically measure within 0.01 to 0.05 inches depending on the device quality and surface condition. Accuracy improves on smooth, flat surfaces and decreases on rough mill scale or curved tubing. They're excellent for non-destructive testing and monitoring wear, but digital calipers are often more practical for initial tubing identification on new material.
What's the difference between wall thickness and gauge in steel tubing?
Gauge is a standardized number (like 14ga or 16ga) that corresponds to a specific wall thickness in decimal inches. For example, 14ga equals 0.083 inches and 16ga equals 0.065 inches. Gauge is useful for quick reference, but always verify the decimal thickness for load-bearing or precision applications. A steel tubing wall thickness chart helps you convert between the two.