

Table of Contents
- Why Good Fabrication Starts Before the Welder Turns On
- Metal Fabrication Layout Techniques: Measuring and Marking Tools
- Cutting, Striking, and Shaping Hand Tools
- Metal Fabrication Clamping Methods: Holding Steel for Accurate Welds
- Best Hand Tools for Welding Preparation
- How to Deburr Carbon Steel Edges Safely and Effectively
- Wrenches, Hex Keys, and Fastening Tools for Fabrication
- Tool Ergonomics and Long-Term Health in the Fabrication Shop
- Calibration and Precision Maintenance for Hand Tools
- Material-Specific Tool Selection for Carbon Steel Projects
- Frequently Asked Questions
Last Updated: September 28, 2026
Why Good Fabrication Starts Before the Welder Turns On
Most fabrication failures trace back to layout and fit-up, not the weld. A joint marked a sixteenth off, clamped crooked, or left with a burr will fight you no matter how steady your hand is. That's why the essential hand tools for custom metal fabrication are the measuring, marking, and clamping tools beginners skip past on their way to the welder.
At JWM Metal Supply, we cut carbon steel tubing, plate, angle iron, and flat bar to order for shops and home builders, and the same question comes up constantly: what do I actually need on the bench? This guide answers that in the order you'll use the tools.
A common mistake is buying a welder first and a square last. Reverse that. Every cut you make on square tubing, angle iron, or flat bar inherits the accuracy of the mark that preceded it.
Metal Fabrication Layout Techniques: Measuring and Marking Tools
Metal fabrication layout techniques begin with one rule: mark from a single reference edge, never from two. Stacking measurements off opposite ends of a piece of angle iron doubles your error. Pick an edge, work from it, and check your diagonals before cutting.
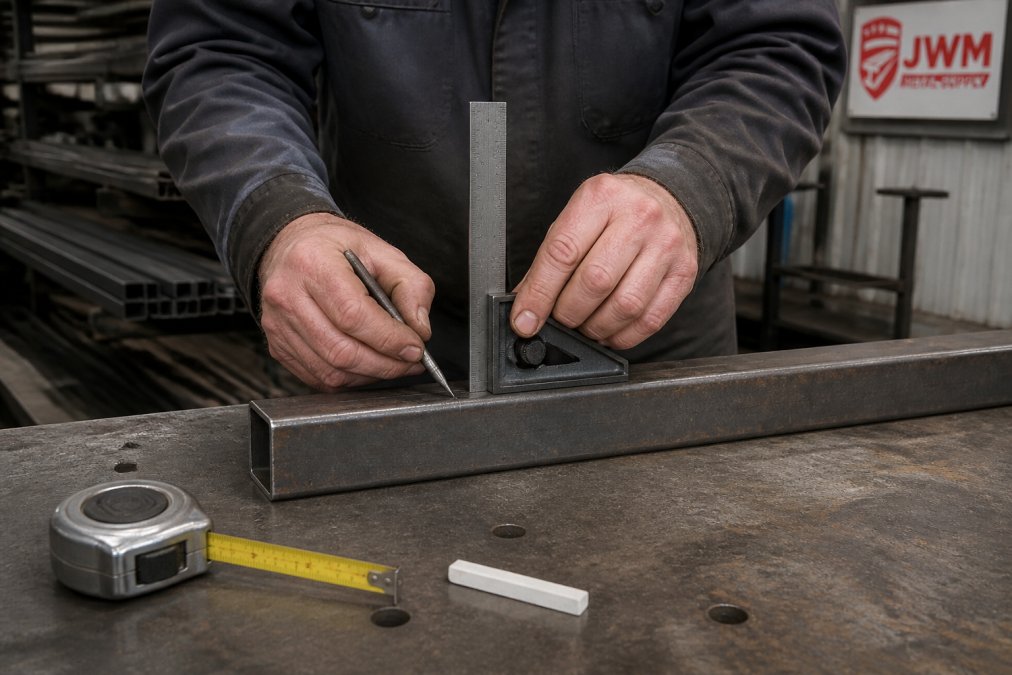
Tape Measures, Steel Rules, and Squares
A 25-foot tape handles long stock; a 6-inch steel rule handles the marks that matter. A combination square gives you 90° and 45° in one tool, while a framing square earns its keep on larger gussets and frame corners. Speed squares are handy for quick angle checks on tubing but too short for full-frame layout.
Check a new square against a known straight edge before you trust it. Drop it once and it's a paperweight.
Scribes, Soapstone, and Center Punches
Soapstone and paint markers are for rough cut lines you'll grind to. A scribe is for finish lines, since a scratch mark survives heat, handling, and a wire brush far better than chalk. Center punches create a drill starting point so the bit doesn't walk across the plate; a fine-point automatic punch speeds that up on repetitive patterns.

Cutting, Striking, and Shaping Hand Tools
Striking tools do three jobs in a fabrication shop: move metal, break slag, and seat parts without marring them. The wrong hammer leaves you with dented tubing and mushroomed chisel heads.
Hammers and Chipping Hammers
A ball-peen hammer is the default for striking punches and chisels and for peening a rivet or pin. A dead-blow hammer seats parts into a vise or against a stop without bouncing back, which matters when tapping a gusset into position. Chipping hammers are welding tools: hatchet-style heads and pointed picks knock slag off a stick or flux-core bead.
A welding chipping hammer with integrated wire brush combines the chipping head and a steel wire brush in one tool, so you chip slag and brush the bead without setting one down. Spring-steel handles on these absorb vibration, which matters if you're cleaning beads all afternoon.
Files, Snips, and Punch and Chisel Sets
A bastard-cut mill file knocks down a burr or squares a slot edge faster than most people expect. Aviation snips handle light sheet and trim work, though they won't touch anything heavier than thin gauge. For cold chisels and punches, a 16-piece punch and chisel set covers taper punches, pin punches, center punches, and cold chisels in one roll, which is the practical way to buy them rather than one at a time.
Metal Fabrication Clamping Methods: Holding Steel for Accurate Welds
Metal fabrication clamping methods fall into two families: mechanical clamps that pull parts together, and magnetic squares that hold angle while you tack. Clamps control the joint; magnets control the geometry.
C-Clamps, Bar Clamps, and Locking Pliers
C-clamps are the workhorse for holding plate, flat bar, and gussets to a table or to each other. F-style bar clamps give you reach and one-handed tightening, worth the extra cost when fitting a long rail. Locking pliers handle small parts, hot cutoffs, and awkward angles where nothing else grips.
Cheap C-clamps flex under load. If the clamp bows when you tighten it, the joint moves with it.
Magnetic Welding Squares and Vises
A magnetic square holds tubing, angle iron, and flat bar at a fixed angle so you can tack without a second pair of hands. A Strong Hand inside/outside angle welding magnet covers 30° and 90° positions on both inside and outside corners, which handles most frame, gate, and trailer work. The switchable version adds an on/off lever so you release the part without prying and keep grinding dust from sticking to the face between jobs.
For holding work while you cut, drill, or bend it, a vise is the anchor of the bench. A 6-inch heavy-duty bench vise with anvil and 360° swivel base gives you 6-inch jaws, roughly 5.9 inches of opening, a locking swivel base, and an integrated anvil surface. If your work is mostly pipe, a dual-chain pipe welding vise holds 1/2-inch through 8-inch diameter with two chains and independent cranks, which distributes clamping pressure and reduces pipe deformation.
| Tool Group | What It Holds | Buy First? |
|---|---|---|
| C-clamps and bar clamps | Plate, flat bar, gussets | Yes |
| Locking pliers | Small parts, hot cutoffs | Yes |
| Magnetic squares | Tubing and angle at fixed angles | Yes |
| Bench vise | Work during cutting and drilling | Yes |
| Pipe vise | Round stock and pipe | Only if pipe is your work |
Best Hand Tools for Welding Preparation
The best hand tools for welding preparation get metal clean and fit tight before the arc starts. Contamination and gaps cause more bad welds than technique does. Mill scale, oil, rust, and paint interfere with arc stability, and a joint that doesn't close up forces you to fill a gap instead of fusing two edges.
Cleaning and Prepping Steel Before You Strike an Arc
Work through it in order:
- Wipe oil and cutting fluid off with a rag before anything else, so you don't grind it into the surface.
- Strip mill scale and rust from the joint faces with a grinder and a flap disc, keeping the wheel on the joint area rather than the whole part.
- Knock the burr off both edges so the parts seat flat against each other.
- Brush the joint with a hand wire brush immediately before welding.
- Tack in two places, check square and diagonal, then tack the rest.
A multi-function MIG welding pliers handles nozzle cleaning, spatter removal, and wire cutting at the gun, which saves a walk to the bench between passes.
How to Deburr Carbon Steel Edges Safely and Effectively
Deburring separates a finished part from a rough one, and it's the step beginners skip. A burr left on a cut edge catches gloves, throws off fit-up by a few thousandths, and gives paint and coatings a place to fail.
Here's a working sequence for a sawn or sheared edge:
- Clamp the part so the edge overhangs the bench or vise by an inch or two.
- Run a mill file along the edge at a shallow angle, pushing away from your body, until the raised lip is gone.
- Follow with a deburring tool or a fine file on the inside of tube and pipe ends.
- Finish with a hand wire brush to lift loose filings.
- Run a gloved finger along the edge, never bare skin, to check for a remaining catch.
Files cut on the push stroke. Dragging them back dulls the teeth and leaves you buying replacements twice as often.
Wrenches, Hex Keys, and Fastening Tools for Fabrication
Fastening tools are where most home shops overbuy and underinvest at once. You don't need a full wall of chrome; you need the sizes that match the bolts on your equipment. Inventory the fasteners on your most common jobs, trailer frames, gate hinges, implement brackets, shop-built tables, and buy to that list rather than a catalog page.
MIG Welding Pliers – Multi-Function →
Adjustable Wrenches: Convenience With a Cost
An adjustable wrench is the tool you grab for a one-off, but it rounds heads if you lean on it. The jaw is only as rigid as the worm screw, and slop between jaw and fastener concentrates force on two corners of the hex instead of all six. Use one for snugging, not final torque. A 10-inch size covers most hardware from 3/8-inch through 3/4-inch; a 12-inch handles larger nuts on equipment and hitches.
Combination Wrench Sets: The Backbone
Combination wrench sets in common fractional sizes cover most trailer, gate, and equipment work with a box end that won't slip. The open end reaches a nut from the side; the box end takes the torque. Buy a set spanning 1/4-inch through 1-inch in 1/16-inch increments, that covers the vast majority of shop hardware, and add metric if you work on imported equipment. A wrench that fits properly is faster than an adjustable and won't round the fastener.
Sockets and Ratchets: Speed on Assemblies
A socket and ratchet set earns its place the first time you assemble a frame with a few dozen bolts. The ratchet runs a nut down without repositioning, which matters overhead or inside a tube cluster. Look for shallow and deep sockets matching your wrench set, a comfortable tooth count for tight swings, and 3-inch and 6-inch extensions. Deep sockets clear threads past a nut; shallow sockets fit where a deep one won't.
Hex Keys: Socket-Head Hardware
Hex keys matter for socket-head cap screws, which show up on clamps, vises, machine guards, and shop-built fixtures. A folding fractional set covers most shop hardware, and a T-handle set speeds up repetitive work. Ball-end keys turn a fastener at an angle, useful in a tight corner, but save the ball end for snugging, it can't take full torque. Use the straight end for final tightening.
Pliers: Grip, Cut, and Hold
Pliers are the tools you reach for when you need a third hand. Locking pliers clamp onto a part and stay there, useful for holding small pieces during a tack, pulling a hot cutoff aside, or backing up a nut you can't reach with a wrench. Slip-joint pliers handle general gripping and bending; needle-nose pliers reach tight spots and bend small wire or sheet edges. Keep a pair of each on the bench and a locking pair within arm's reach of the welder.
What to Buy First
If you're building a bench from scratch, buy in this order: a combination wrench set in fractional sizes, a matching socket and ratchet set, a folding hex key set, a pair of locking pliers, and one adjustable wrench for the odd job. Add metric sizes and specialty tools as projects demand. Buy sets with clear size markings and a case, loose sockets in a drawer cost more time than the set costs money.
Tool Ergonomics and Long-Term Health in the Fabrication Shop
Hand-arm vibration and repetitive gripping cause more career-ending problems in fabrication shops than cuts do. Chipping hammers, grinders, and files transmit vibration into the hand, and the damage accumulates quietly over years.

Three changes make a measurable difference. Choose tools with shock-absorbing handles, like the spring-steel handles on chipping hammers, over solid steel. Vary your grip and switch hands where the task allows. Clamp the work so you're not fighting it with one hand while the other runs the tool.
Set the bench height so your elbows sit near 90° when you file or deburr. A bench that's too low forces you to hunch, and a bench that's too high makes you reach. Neither shows up as a problem in week one.
For extended grinding and chipping, wear anti-vibration gloves. They don't eliminate exposure, but they cut it.
Calibration and Precision Maintenance for Hand Tools
Squares go out of true, tapes get dropped, and calipers drift. Checking your tools takes minutes and prevents a whole batch of parts from being cut wrong.
- Check a combination square against a known straight edge monthly, and after any drop.
- Verify tape measures against a steel rule at the 12-inch mark.
- Check calipers against a known gauge or a gauge block before critical work.
- Inspect chisel and punch heads for mushrooming and dress or replace them.
- Replace file cards and wire brushes when the bristles splay.
- Wipe tools down after use; moisture and grinding dust are what actually kill them.
Mushroomed chisel heads are a real hazard, not a cosmetic issue. The deformed lip can chip off under a hammer strike. Dress the head on a grinder or replace the tool.
Material-Specific Tool Selection for Carbon Steel Projects
Most tool guides treat steel as one material. It isn't. The form you're holding, tubing, angle, flat bar, plate, round bar, or pipe, changes which hand tools earn their place on the bench and how you use them.
Square and Rectangular Tubing
Tubing is the most common stock in frame, gate, and trailer work, and it rewards a specific kit. A magnetic square holds the joint at a fixed angle so you can tack without a second pair of hands. A combination square checks that your cut end is square to the tube's length, a cut a degree off compounds across a long assembly. A scribe gives you a wrap-around line that survives handling, and a file or deburring tool cleans the inside edge where the tube wall meets the corner, where burrs hide and fit-up gaps start.
Angle Iron
Angle iron has a natural reference edge, the inside corner, which makes layout easier than tubing if you use it. A framing square earns its keep on corner layout, since the legs give you a flat surface to register against. C-clamps hold the angle to a table or another piece during fit-up, and a ball-peen hammer seats the part against a stop.
Flat Bar and Plate
Flat bar and plate are where clamping and hole layout dominate. C-clamps and bar clamps hold the work to the table or another part. A center punch marks hole locations so the drill bit doesn't walk, a fine-point automatic punch speeds this up on repetitive patterns. For layout, a combination square and scribe give you clean lines, and a steel rule handles short measurements a tape can't reach accurately.
Round Bar and Pipe
Round stock and pipe punish poor workholding the most. A pipe vise or pipe stand holds the work at a comfortable height and lets you rotate it instead of dragging it across the bench. A wrap-around, a flexible strip marked in increments, gives you a square cut line around the circumference, which a tape and scribe can't do cleanly. For layout on round bar, a center finder or a combination square with a center head locates the axis so you can mark a cross-hole accurately.
Gussets and Small Parts
Gussets tie a frame together and are usually cut from flat bar or light plate. Aviation snips handle light gauge; a file handles heavier stock. A magnetic square holds the gusset at the correct angle during tack, and a locking plier or small C-clamp backs it up when the magnet alone won't hold against a gap. Deburr the edges before fitting, a burr on the mating face holds the gusset off the frame by a few thousandths and shows up as a gap you have to fill.
The Takeaway on Material
The tool list doesn't change much from one carbon steel form to the next, but the emphasis does. Tubing and angle reward layout and clamping tools. Plate and flat bar reward hole-layout and deburring tools. Round stock and pipe reward workholding and wrap-around layout. Build your bench around the forms you actually cut.
Frequently Asked Questions
What are the most important hand tools for a beginner metal fabricator?
Start with accurate measuring and layout tools: a 25-foot tape measure, a 12-inch combination square, a steel rule, a scribe, and a center punch. Add a 4-pound hammer, locking pliers, at least four C-clamps, a magnetic welding square, and a good file set. These cover marking, holding, and finishing on nearly every carbon steel project, from square tubing frames to angle iron brackets, before you spend money on specialty tools.
How do you accurately mark and measure carbon steel for fabrication?
Use a tape measure or steel rule to establish overall dimensions, then a combination square to transfer 90-degree lines around tubing and flat bar. Mark with a scribe for a fine, precise line, or soapstone for torch-cut work where heat would burn off a marker. Center punch your mark before drilling so the bit does not wander. Measure twice and mark once; a 1/16-inch layout error compounds fast once you start welding.
Why is proper clamping essential for welding square tubing and angle iron?
Steel moves when it heats. Without clamps, magnetic squares, or a vise holding parts in position, square tubing pulls out of alignment as the weld cools, and angle iron corners open up. Clamping locks your fit-up before you tack, so the finished assembly stays square. Use C-clamps or bar clamps for flat joints, magnetic squares for 90-degree corners, and a pipe vise for round stock. Tack, check, then weld.
What are the best hand tools for deburring and finishing steel edges?
A mill file removes the sharp burr left by a hacksaw or band saw, a deburring tool handles inside edges and holes, and a hand wire brush cleans scale and slag before paint or welding. For heavier cleanup, a chipping hammer with an integrated wire brush does double duty. Always deburr carbon steel edges before handling or welding; sharp burrs cut gloves and create stress points that can crack under load.